This tutorial walks through the steps necessary to set up a server and
a client on the ENF. Both the client and server machines are
implemented as Docker images. The Docker containers can be run on the
same machine or on separate machines. Separate machines may better
illustrate that traffic is routed through Xaptum’s ENF, but the
mechanism is the same, either way.
The How-To Guides have more detail and include instructions for connecting VMs and Raspberry Pi devices.
Before beginning this tutorial, create a demo account on the Sign Up page.
Make note of your /64 network address as it will be used throughout the
tutorial. The network address will be displayed after logging in to the
Xaptum ENF Dashboard.
The dashboard will look like the following:
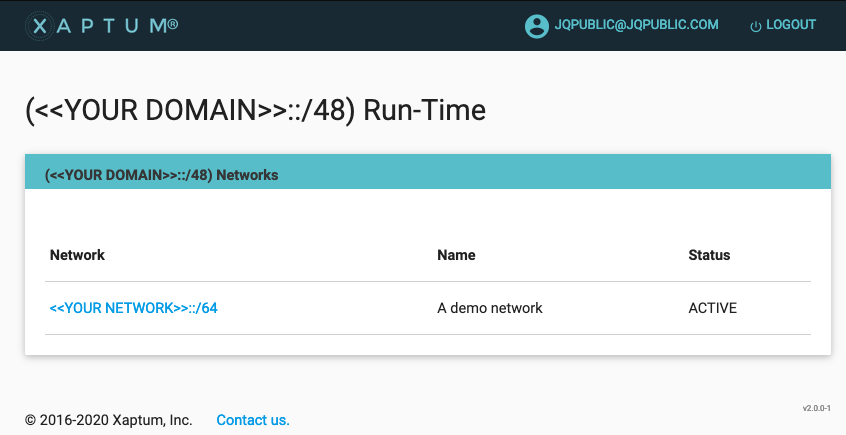 The address of interest is the
 /64 address listed as <<YOUR NETWORK>> in
the image.
This tutorial was created on a Linux device and makes some assumptions based on the environment. Installation on a Mac should be nearly identical. Using a Windows machine has not been attempted, but should be possible without much modification since all of the tools are available.
<<YOUR NETWORK>>::/64jqpublicAdjust commands and expected responses appropriately.
The following tools will need to be installed prior to running through the tutorial:
The Edge Network Fabric Command Line Interface (enfcli) is a text-based tool that allows customers to manipulate the ENF and devices attached to the ENF.
The enfcli is written in Ruby and installs as a Ruby Gem.
$ sudo gem install enfcli
$ enfcli --host demo.xaptum.io --user [email protected]
Connecting to 'https://demo.xaptum.io'.....
Enter Password:
Enter the ENF password.
enfcli has built-in help.
To get a list of available commands:
> help
To get help with a specific command, use the –help option.
For help on the user command
> user --help
For details on a specific sub-command
> user send-invite --help
For the tutorial, we will create two ENF endpoints - a simple server that responds to an HTTP request and a client to make the requests.
The steps follow the README file from the xaptum/enf-services github repository.
Docker images for the ENF require IPv6 support, which is not enabled by default in most Docker installations. To enable it, add the following options to the Docker daemon configuration file daemon.json.
"ipv6" : true"fixed-cidr-v6" : "fd00:d0c::/64"and restart the Docker daemon.
On Linux, daemon.json is located at /etc/docker/daemon.json.
On Mac OS, change it via the Docker Preferences->Daemon->Advanced menu.
The fixed-cidr-v6 option is required due to a
bug in Docker. The
fd00:d0c::/64 prefix is arbitary. Replace it as desired.
In order to securely communicate, the docker containers and the ENF must share a set of public/private keys. The ENF must also know the address to assign to the endpoints. This task is accomplished via the enfcli.
> mkdir -p ~/enf-server/enf0
> mkdir -p ~/enf-client/enf0
cd into the server directory.
> cd ~/enf-server/enf0
network administrator.> enfcli --host demo.xaptum.io --user [email protected]
Connecting to 'https://demo.xaptum.io'.....
Enter Password:
> iam create-endpoint-key --key-out-file=enf0.key.pem --public-key-out-file=enf0.pub.pem
Created enf0.key.pem
Created enf0.pub.pem
> iam create-endpoint-cert --cert-out-file=enf0.crt.pem --identity=<<YOUR NETWORK>>::deb:1 --key-in-file=enf0.key.pem
Created /home/jqpublic/enf-server/enf0/enf0.crt.pem
> iam create-endpoint-from-cert --cert-in-file=enf0.crt.pem
Created new ipv6 endpoint <<YOUR NETWORK>>::deb:1
cd into the client directory. This can be done from inside of the enfcli
> cd ~/enf-client/enf0
> iam create-endpoint-key --key-out-file=enf0.key.pem --public-key-out-file=enf0.pub.pem
Created enf0.key.pem
Created enf0.pub.pem
--identity parameter.
> iam create-endpoint-cert --cert-out-file=enf0.crt.pem --identity=<<YOUR NETWORK>>::deb:c001 --key-in-file=enf0.key.pem
Created /home/jqpublic/enf-client/enf0/enf0.crt.pem
> iam create-endpoint-from-cert --cert-in-file=enf0.crt.pem
Created new ipv6 endpoint <<YOUR NETWORK>>::deb:c001
enfcli
> exit
<<YOUR NETWORK>>::/64The demo containers are published on the Docker hub.
> docker pull xaptum/enf-demo-server
> cd ~/enf-server
> docker run -P                                             \
    --cap-add=NET_ADMIN                                     \
    --device /dev/net/tun:/dev/net/tun                      \
    --sysctl net.ipv6.conf.all.disable_ipv6=0               \
    --sysctl net.ipv6.conf.default.disable_ipv6=0 -d        \
    --volume `pwd`/enf0:/data/enf0:ro                       \
    --name enf-demo-server xaptum/enf-demo-server:latest
> docker pull xaptum/enftun
> cd ~/enf-client
> docker run                                        \
    --cap-add=NET_ADMIN                             \
    --device /dev/net/tun:/dev/net/tun              \
    --sysctl net.ipv6.conf.all.disable_ipv6=0       \
    --sysctl net.ipv6.conf.default.disable_ipv6=0   \
    --volume `pwd`/enf0:/data/enf0:ro               \
    -it xaptum/enftun:latest bash
<<YOUR NETWORK>>::/64To stop the client, simply log out of the interactive shell:
> exit
To stop the server and remove the container:
docker stop enf-demo-server
docker rm enf-demo-server
Now that both endpoints are connected to the overlay, let’s test the
connection using one of the most common and simple tools in a network
engineer’s toolbox, ping. Along the way, you’ll also learn how to
configure the ENF firewall to control the types of traffic allowed
between endpoints.
Try pinging the server container from the client. After several
seconds, press Ctrl-C to exit ping.
> ping <<YOUR NETWORK>>::deb:1
PING <<YOUR NETWORK>>::deb:1 56 data bytes
^C
--- <<YOUR NETWORK>>::deb:1 ping statistics ---
4 packets transmitted, 0 received, +3 errors, 100% packet loss, time 3056ms
All the pings have failed because the default configuration of the ENF firewall is to block all traffic. You must explicitly allow the types that your devices and servers should be allowed to send and receive. This approach helps keep your network secure.
Configuring the ENF firewall should be familar to anyone experienced with network firewalls boxes or AWS network ACLs. The rules specify the source and destintation addresses (subnet or specific IP), transport protocol (TCP, UDP, or ICMP), and source and destination ports for allowed traffic. The firewall is stateless, so you must configure separate rules for inbound (ingress) and outbound (egress) traffic.
First, use the enfcli to create two rules allowing the client to send
pings to the server and receive responses from it. Although this
tutorial only uses one client, we want all clients on the network to
be able to ping the server, but not each other.
enfcli-jqpublic@demo> firewall add-firewall-rule --network=<<YOUR NETWORK>>::/64
                               --action=ACCEPT --priority=100 --protocol=ICMP6
                               --source-ip=<<YOUR NETWORK>>::/64 --dest-ip=<<YOUR NETWORK>>::deb:1
                               --direction=EGRESS
Created firewall rule!

enfcli-jqpublic@demo> firewall add-firewall-rule --network=<<YOUR NETWORK>>::/64
                               --action=ACCEPT --priority=100 --protocol=ICMP6
                               --source-ip=<<YOUR NETWORK>>::deb:1 --dest-ip=<<YOUR NETWORK>>::/64
                               --direction=INGRESS
Created firewall rule!
Second, use the enfcli to also create two rules allowing the server
to receive pings from the client and send responses. Creating four
rules may seem quite verbose, especially if you are familar with other
firewalls. Remember that the ENF firewall sits between the client and
server endpoints, so you are essentially configuring two separate
firewalls, one for the client and one for the server.
enfcli-jqpublic@demo> firewall add-firewall-rule --network=<<YOUR NETWORK>>::/64
                               --action=ACCEPT --priority=100 --protocol=ICMP6
                               --source-ip=<<YOUR NETWORK>>::/64 --dest-ip=<<YOUR NETWORK>>::deb:1
                               --direction=INGRESS
Created firewall rule!

enfcli-jqpublic@demo> firewall add-firewall-rule --network=<<YOUR NETWORK>>::/64
                               --action=ACCEPT --priority=100 --protocol=ICMP6
                               --source-ip=<<YOUR NETWORK>>::deb:1 --dest-ip=<<YOUR NETWORK>>::/64
                               --direction=EGRESS
Created firewall rule!
Now try pinging the server again. This time they should succeed.
> ping <<YOUR NETWORK>>::deb:1
PING <<YOUR NETWORK>>::deb:1 (<<YOUR NETWORK>>::deb:1) 56 data bytes
64 bytes from <<YOUR NETWORK>>::deb:1: icmp_seq=1 ttl=118 time=11.0 ms
64 bytes from <<YOUR NETWORK>>::deb:1: icmp_seq=2 ttl=118 time=9.91 ms
64 bytes from <<YOUR NETWORK>>::deb:1: icmp_seq=3 ttl=118 time=10.7 ms
64 bytes from <<YOUR NETWORK>>::deb:1: icmp_seq=4 ttl=118 time=9.60 ms
...
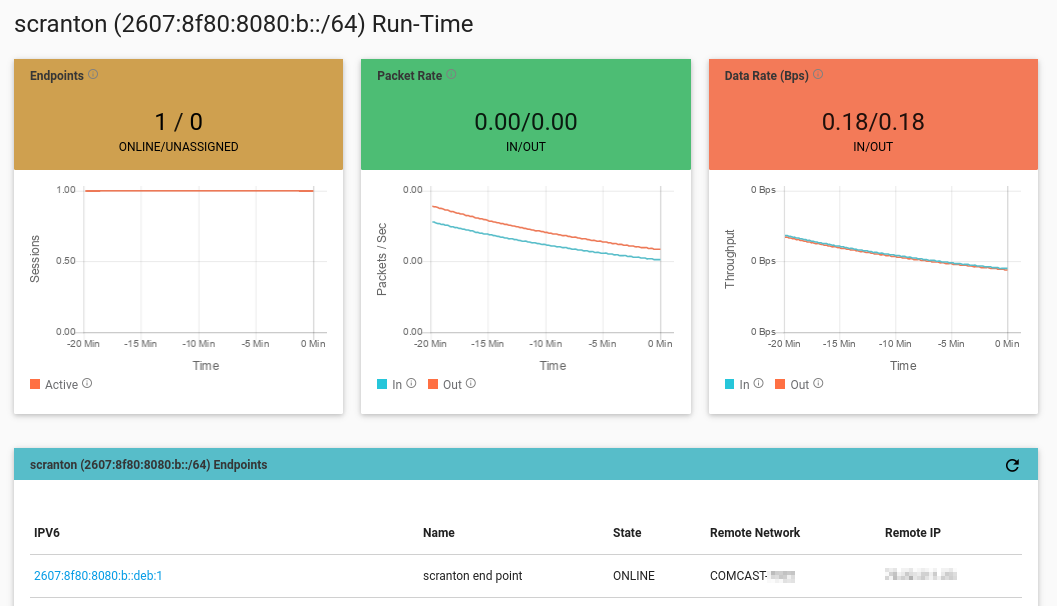
The ENF dashboard shows traffic statistics in real-time, allowing you to easily monitor the activity on your network. With the ping still running, open the dashboard in your web browser. The packet rate and data rate graphs will have increased, showing the ping traffic on your network.
To address a specific endpoint without having to use its IPv6 identity, a DNS domain can be specified. The ENF supports private DNS zones and servers, available only within a customer’s ENF network.
The first step in provisioning DNS services for your network is to define a DNS zone. The domain name of a zone sets the suffix shared by all DNS records in that zone. For example, in a zone named “foo.bar” we might have records “one.foo.bar” and “two.foo.bar” and “client.foo.bar” and “server.foo.bar”, etc.
The name of your zone can be anything you like,
because it’s private to your network.
For this tutorial, we’ll use the name getting-started.enf.
enfcli-jqpublic@test> dns create-zone --zone-domain-name=getting-started.enf --enf-network=<<YOUR NETWORK>>::/64 --description="Getting Started"

  Created DNS zone getting-started.enf!
  +--------------------------------------+---------------------+-----------------+------------+---------------------+
  | Id                                   | Zone                | Description     | Privileged | Enf Domain          |
  +--------------------------------------+---------------------+-----------------+------------+---------------------+
  | <<ZONE-ID>>                          | getting-started.enf | Getting Started | false      | 2607:8f80:8080::/48 |
  +--------------------------------------+---------------------+-----------------+------------+---------------------+
  1 rows in set
We can now add a DNS record for our server,
so our client can reach it using just its domain name.
We’ll call the server server.
enfcli-jqpublic@test> dns create-record --ttl=30 --type=AAAA --name=server --value=<<YOUR NETWORK>>::deb:1 --zone-id=<<ZONE-ID>>
For endpoints in our network to be able to use this DNS zone, we must provision a DNS server for our network to use. This server is what will respond to DNS queries in the network, resolving domain names to their ENF IPv6 addresses.
enfcli-jqpublic@test> dns provision-server --network=<<YOUR NETWORK>>::/64 --description="Getting Started"

  +--------------------------------------+--------------------------------------+-----------------------+-----------------+
  | Id                                   | IPv6                                 | Network               | Description     |
  +--------------------------------------+--------------------------------------+-----------------------+-----------------+
  | d1cc16dd-f8ec-41c8-a530-d0bf2dff114e | <<YOUR NETWORK>>:<<DNS-SERVER>>      | <<YOUR NETWORK>>::/64 | Getting Started |
  +--------------------------------------+--------------------------------------+-----------------------+-----------------+
  1 rows in set
Let’s test it!
We need to have our client container use the new private DNS server to resolve ENF domains,
so exit the client container.
Restart it, using the same docker command as before,
but add the flag --dns <<YOUR NETWORK>>:<<DNS-SERVER>>.
This tells the container to use this address as DNS nameserver for
resolving DNS queries.
root@client:/# ping server.getting-started.enf

  PING server.getting-started.enf (<<YOUR NETWORK>>::deb:1) 56(84) bytes of data.
  64 bytes from yb-in-f139.1e100.net (<<YOUR NETWORK>>::deb:1): icmp_seq=1 ttl=107 time=13.0 ms
  64 bytes from yb-in-f139.1e100.net (<<YOUR NETWORK>>::deb:1): icmp_seq=2 ttl=107 time=14.3 ms
Success!
The enf-demo-server docker container started earlier runs a TCP server that
listens on port 8080 and
serves simple text responses upon TCP connection.
This server can be imagined as, say, an MQTT broker sitting
in your data center, to which all of your devices send their data.
We can test that this traffic is flowing safely through the ENF
using the simple curl client.
To allow any device in our ENF IPv6 network to access this server,
we’ll open the firewall to allow any address in this /64 network
to make inbound connections to and receive responses from this
server.
This requires adding the following four firewall rules using the enfcli:
> firewall add-firewall-rule --action=ACCEPT --direction=INGRESS --network=<<YOUR NETWORK>>::/64 --protocol=TCP --priority=200 --source-ip=<<YOUR NETWORK>>::/64 --dest-ip=<<YOUR NETWORK>>::deb:1 --dest-port=8080
> firewall add-firewall-rule --action=ACCEPT --direction=EGRESS --network=<<YOUR NETWORK>>::/64 --protocol=TCP --priority=200 --source-ip=<<YOUR NETWORK>>::/64 --dest-ip=<<YOUR NETWORK>>::deb:1 --dest-port=8080
> firewall add-firewall-rule --action=ACCEPT --direction=INGRESS --network=<<YOUR NETWORK>>::/64 --protocol=TCP --priority=200 --dest-ip=<<YOUR NETWORK>>::/64 --source-ip=<<YOUR NETWORK>>::deb:1 --source-port=8080
> firewall add-firewall-rule --action=ACCEPT --direction=EGRESS --network=<<YOUR NETWORK>>::/64 --protocol=TCP --priority=200 --dest-ip=<<YOUR NETWORK>>::/64 --source-ip=<<YOUR NETWORK>>::deb:1 --source-port=8080
Now, test that the other docker container started earlier can contact this server and receive a reply.
Run this from the client Docker image:
(Note that the server name and zone (server.getting-started.enf) were set up in the Setting up Private DNS)
> curl server.getting-started.enf:8080

            Welcome to the Xaptum, Inc. Demonstration Server

This simple server is responding from the enf-demo-server.

If you are seeing this in response to a CURL or WGET request, then the
round-trip communication is successful.
Success!
For this test, you’ll also need to install the nmap tool.
Let’s verify that the two containers aren’t listening for any connections from the outside world, and offer no information to malicious parties scanning them.
To do this, we’ll use the nmap port scanning tool
to scan all possible ports and see if any are open.
First, we need the IP addresses of our two Docker containers.
From the host machine running the containers, run the following:
> docker ps

CONTAINER ID        IMAGE                          COMMAND                  CREATED             STATUS              PORTS               NAMES
...
c8f46b05ce55        xaptum/enftun                  "entrypoint.sh /bin/…"   34 minutes ago      Up 34 minutes                           loving_hamilton
776129283d19        xaptum/enf-demo-server         "entrypoint.sh /bin/…"   34 minutes ago      Up 34 minutes                           infallible_joliot
...
Use the CONTAINER IDs of the two containers to find the get their IP addresses from Docker:
> docker inspect -f '{{range .NetworkSettings.Networks}}{{.IPAddress}}{{end}}' c8f46b05ce55

172.17.0.2

> docker inspect -f '{{range .NetworkSettings.Networks}}{{.IPAddress}}{{end}}' 776129283d19

172.17.0.3
In the example output shown above, the server is at 172.17.0.3,
and the client is at 172.17.0.2.
To scan the ports of the client:
> nmap -n -T4 -p 1-65535 172.17.0.2

Starting Nmap 7.60 ( https://nmap.org ) at 2020-06-17 16:50 EDT
Nmap scan report for 172.17.0.2
Host is up (0.000066s latency).
All 65535 scanned ports on 172.17.0.3 are closed

Nmap done: 1 IP address (1 host up) scanned in 0.92 seconds
Similarly, to scan the ports of the server:
> nmap -n -T4 -p 1-65535 172.17.0.3

Starting Nmap 7.60 ( https://nmap.org ) at 2020-06-17 16:50 EDT
Nmap scan report for 172.17.0.3
Host is up (0.000068s latency).
All 65535 scanned ports on 172.17.0.3 are closed

Nmap done: 1 IP address (1 host up) scanned in 0.95 seconds
Notice that both scans reported All 65535 scanned ports ... are closed.
This means our containers won’t let anyone connect to them.
Their only means of communication is by making an outbound
connection to the ENF, and passing traffic over it.
Contact us and we’ll get back to you as soon as possible.
Contact Us